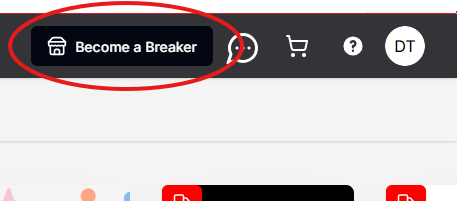
Step 1 – Application Submission
If you’re reading this then, chances are, you’ve already submitted your application! If not, click on the Become a Breaker button and get started!
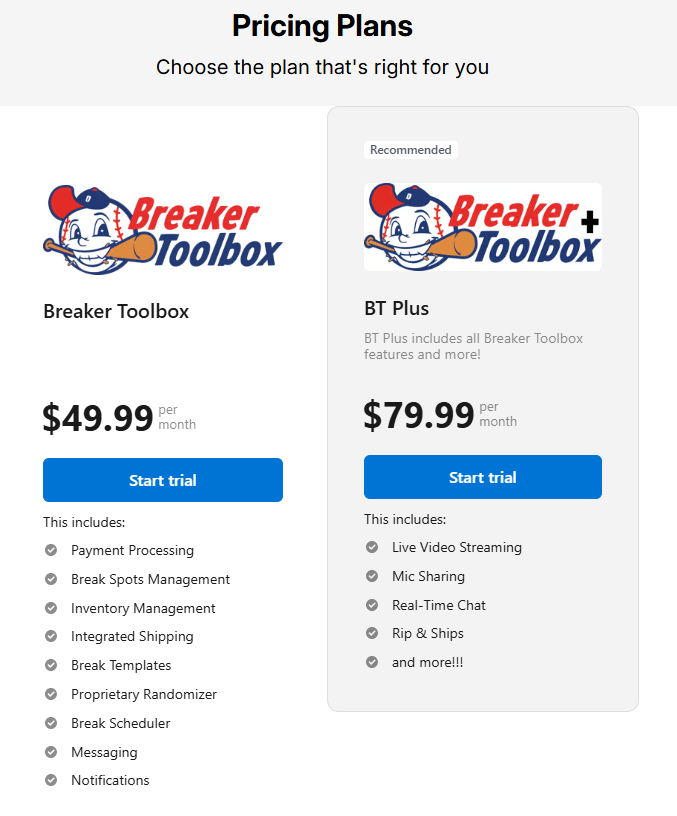
Step 2 – Choose Your Subscription Plan
Your first decision is whether you plan to stream your breaks on Breaker Toolbox or somewhere else.
The basic Breaker Toolbox plan gives you all the tools you need to run a successful break. If you already have a strong social media presence, or if you prefer to break on Facebook, YouTube, TikTok, or somewhere else, then this is the plan for you. It gives you the opportunity to continue to build your social media presence without being tied into any specific platform.
The BT Plus plan is for breakers who wish to stream on Breaker Toolbox. You get all of the benefits of the basic plan, plus everything that comes with Breaker Toolbox streaming: real-time chat, mic sharing, rip & ships, and more.
Both plans come with a free 30 day trial so there’s no risk.
Tip – Choose the basic Breaker Toolbox plan for now. You can always upgrade later.
Step 3 – Setup Your PayPal Account
PayPal is the preferred payment method for most collectors, so while accepting PayPal payments is optional, it is highly recommended. PayPal processing fees can vary but if you are familiar with PayPal Goods & Services then they are very similar. Check the latest fees here.
Step 1 – Apply for a PayPal business account.
Step 2 – Once your PayPal business account has been approved, you will need to configure it to allow payments from Breaker Toolbox users. See how here.
Tip – PayPal has very stringent requirements and sometimes restricts new business accounts. If you are notified by PayPal that your account has been restricted, we recommend emailing PayPal and indicating that your account will be used for “selling sports cards”. Unfortunately, this is a common scenario.
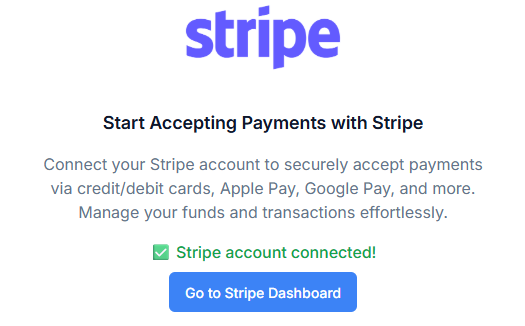
Step 4 – Setup Your Stripe Account
You may or may not have heard of Stripe, but it is a large and robust payment processing platform. While most collectors use PayPal to pay, offering Stripe gives your customers many more options. In addition to Via and Mastercard, Stripe also allows users to pay using Google Pay, Apple Pay, and many more. So while it’s not required, we strongly recommend it.
Stripe’s payment processing fees are very similar to PayPal G&S. Read here for details. Stripe also has a very useful dashboard for tracking your payouts.
Go to your Breaker Toolbox Profile, choose Breaker, and then Stripe.
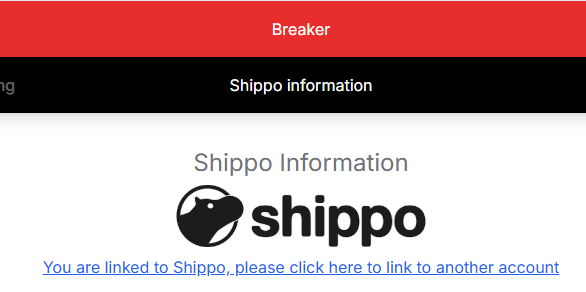
Step 5 – Setup Your Shippo Account (Optional)
If you’re still going to the post office to ship packages, STOP IMMEDIATELY! Setup an account with Stamps.com, PirateShip, or better yet, Shippo.
If you already use another 3rd party shipper, then Breaker Toolbox can support you by allowing breakers to add tracking numbers so that buyers are alerted when their cards are shipped. However, Breaker Toolbox also offers integrated shipping using Shippo.
Go to your Breaker Toolbox Profile, choose Breaker, and then Shippo Information to setup your account.
Step 6 – Complete Your Breaker Profile
Introduce yourself to potential buyers by completing your breaker profile. While all of this information may be important to different buyers, an important step is to verify your Seller Link. This is the url for your Breaker Toolbox homepage (and soon to be Clubhouse!) If you wish to change this url please reach out to your Breaker Toolbox representative or email support@djawn.com.
Step 7 – Plan Out Your First Break
What product(s) do you want to break? Will it be a PYT (pick your team), random team, random division, or something else? When do you want to break it?
If you’re just starting out, here are some recommendations for your first break:
- Choose a product in high demand.
- Keep your prices reasonable.
- Choose a date and time that buyers will be interested in participating. Typically, nighttime is better than daytime. Weekends are better than weekdays.
Building a following is the most difficult part of becoming a breaker, so don’t give first-time customers a reason to not buy from you.
Tip – We recommend you plan your first Breaker Toolbox break two weeks out to give our marketing department sufficient time to help promote your break.
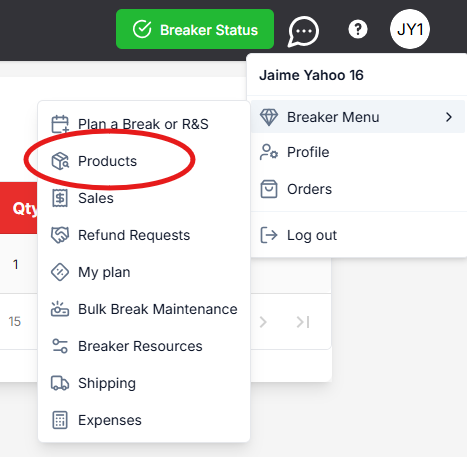
Step 8 – Add Products
Before setting up your first break, you’ll need to add products via the Products screen.
Required fields are indicated with a *.
Be sure to add a photo as well.
For video help on adding products, click here.
Tip – Add just the products for your first break. Once you become familiar with Breaker Toolbox, you can add more products.
Step 9 – Work With Breaker Toolbox To Promote Your Break
This step is very important! If you have not yet done so, schedule a meeting ASAP with Breaker Toolbox to discuss how best to market you and your breaks. Contact your representative directly or send an email to support@djawn.com.
Step 10 – Setup Your First Break
Now it’s time to actually setup your first break on Breaker Toolbox. We hope that planning your first break is intuitive but we’re here to help every step of the way. Reach out to your Breaker Toolbox representative or support@djawn.com at any time with questions or feedback.
Tip – We recommend you set your first break to Private so that it is not visible to anyone who does not have the direct link. Once setup, reach out to your Breaker Toolbox representative or support@djawn.com to review your break. Once it looks good, you can make the break public.
Step 11 – Promote Your Break
Promote your break on social media. Get help doing that here.
Step 12 – Prepare For Your Break
Read this guide to prepare for how to conduct your first break.
Also, check out the Breaker Toolbox Toolkit which has lots of useful tools and information.